
HLS Packaging
This Tutorial guides you through the steps involved in packaging HLS content to use with ExpressPlay. This tutorial guides you through the process using Encoding.com and S3.
Requirements
- The Apple HLS Tools (Apple Developer Site)
- An Encoding.com account (Free Trial)
- A storage solution (S3, CF, Azure, Aspera or FTP Server)
- HD MP4 Content
The Apple HLS Tools are compatible with OS X and allow users to encrypt both MPEG and MP4 media types. This tutorial focuses on packaging HLS content on OS X for use with ExpressPlay. To that end, this tutorial assumes you have unencrypted high quality MP4 content ready for transcoding.
For the purposes of this tutorial we are using Big Buck Bunny as the source material. 1920×1080 is recommended to provide as many different bit rates as possible though there are several resolutions available at the link below.
http://www.bigbuckbunny.org/download/
STEP 1 – Using Encoding.com to make Encrypted HLS Content
Encoding.com provides a free usage tier that makes it ideal for this tutorial. Establish or login to your account here Encoding.com accepts file uploads from a browser as well as other methods. In this case, upload your video directly. For this tutorial we will be use an HD version of the Big Buck Bunny trailer, if you also wish to use the HD version, you can download it here.
NOTE: while this tutorial uses Encoding.com for simplicity other tools are equally suitable. Please consult http://www.expressplay.com/developer/packaging for further references. The m3u8 updates discussed in the sections below however remain the same.
With your content uploaded, you need to select an output type. Select Adaptive Streaming Formats from the drop down menu on the right. Then Apple HLS iPhone or iPad from the second pull-down menu (this tutorial uses iPhone). Next select your destination; this is the location to which the file will be uploaded when the file is finished being encoded. This tutorial uses S3 for the file destination.
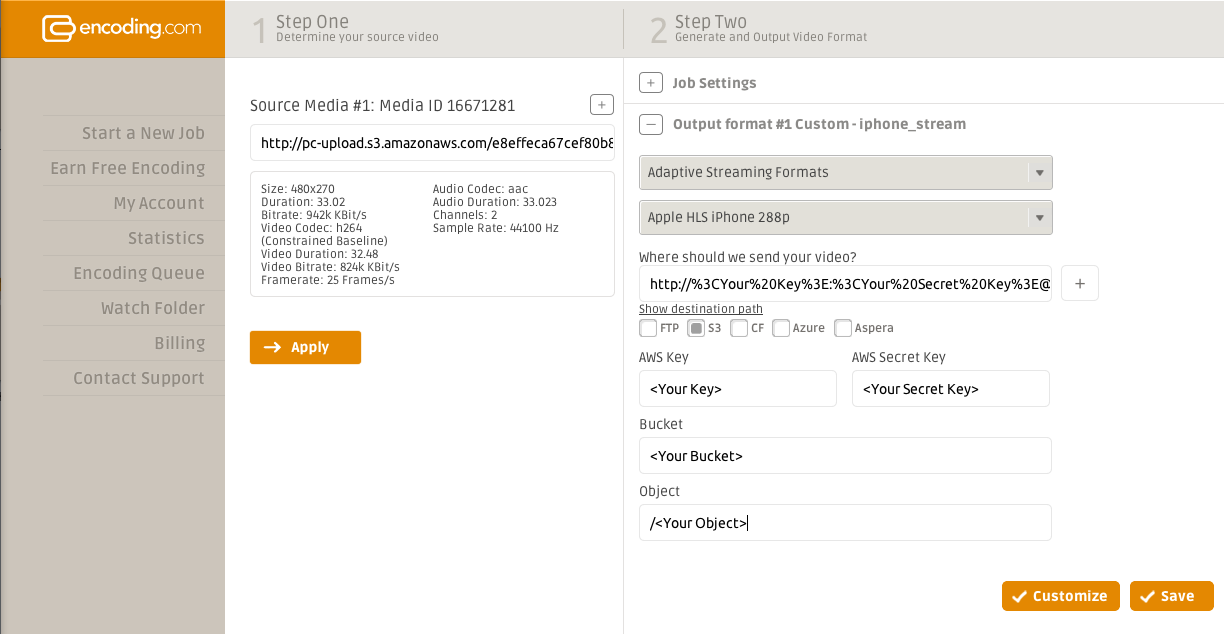
After filling out your destination credentials, in this case your AWS Key, Secret Key, and Bucket, click the Customize button on the lower right.
The window will expand out and reveal several options. For use with ExpressPlay, the HLS content must be encrypted. Select Adaptive Settings, and the window will display AES encryption options. Set the AES option to Yes and provide an Encryption Key. Be sure to save the key, it will be required later in the process.
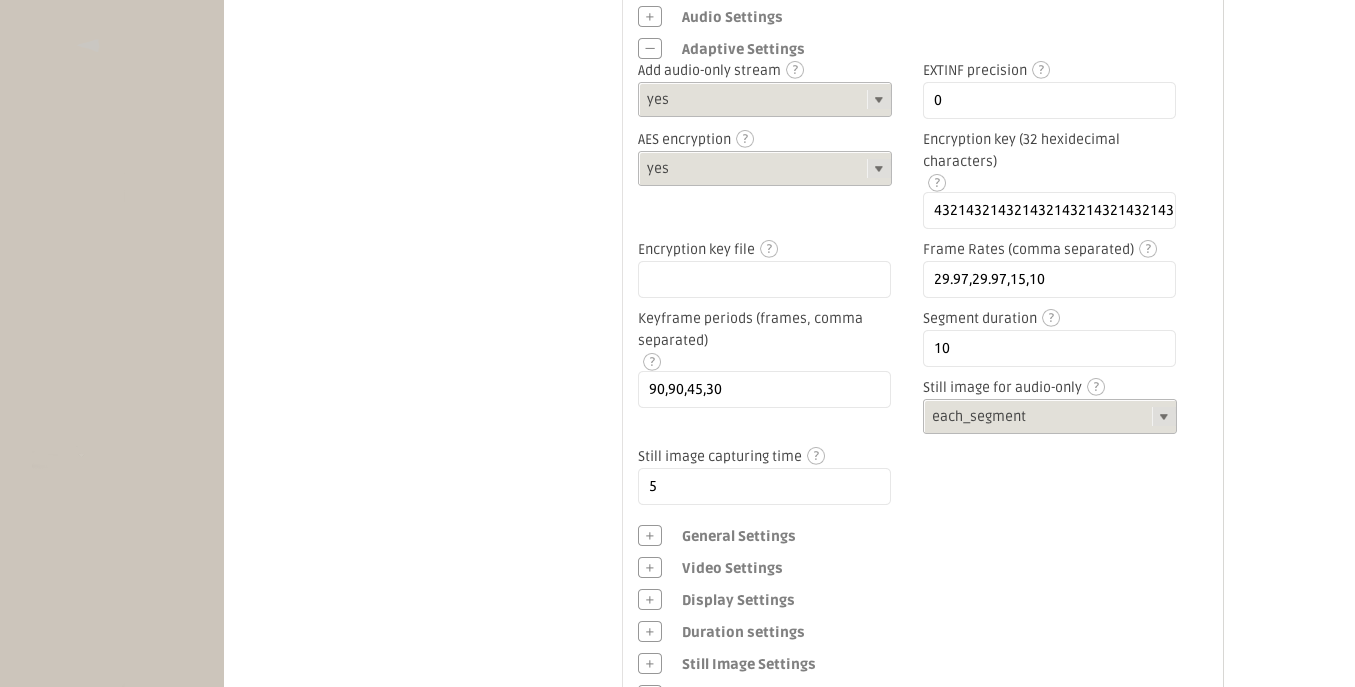
For the purposes of this tutorial we have used an easy to remember, though insecure key; “43214321432143214321432143214321”.
With encryption enabled, click the Save button and then select Process Video. This action starts the process of transcoding and encrypting your video. When this process is complete, you get a nearly complete HLS adaptive file set in the form of a Tarball delivered to your output destination.
Download and open the Tarball. Inside you will find multiple .m3u8 playlist files and multiple .ts video files.
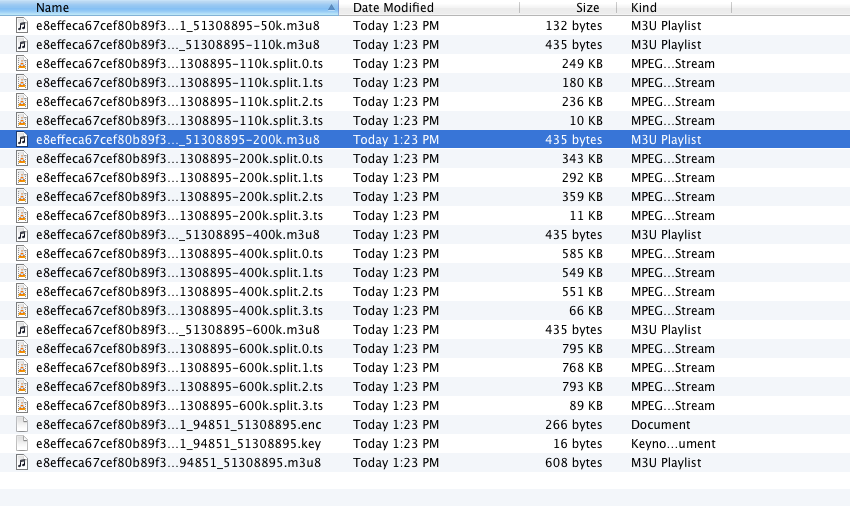
Each .m3u8 file is a playlist file containing instructions on decryption and duration for the player. Each .ts file is a chunk of playable media in the specified bi trate. In the example above, there are files for 110, 200, 400 and 600 kilobits/second.
STEP 2 – Configuring the Playlist Files
ExpressPlay requires that each media item have two identifiers: the Content Key and Content ID. The Content Key is the encryption key that was used above, and the Content ID, or CID, is a string associated with each piece of content.
The .ts files are fine as they are, however the playlist files must be configured for use with ExpressPlay. Open the .m3u8 file ending in -110k.m3u8 in your favorite text editor. Find the Target Duration, Key Method, URI and a directory of the associated .ts files.
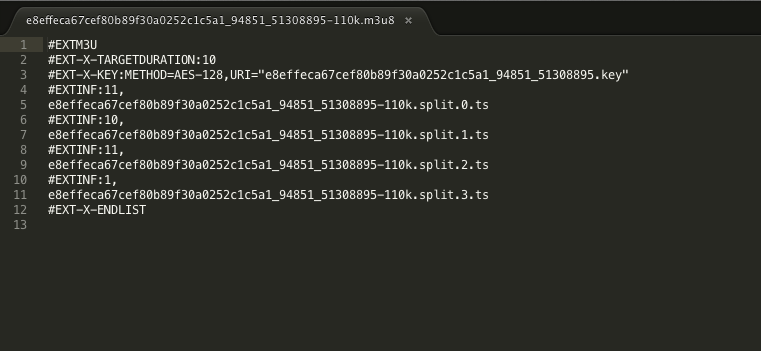
In this example, notice the TargetDuration is 10. Each file has a duration, this is listed as the EXTINF value in the line preceding the file name. The Encoding.com output files do not meet the HLS spec completely. In this case, the Target Duration value is actually lower then the longest duration in the file set in some situations. Each .m3u8 file must have its Target Duration value set to match the longest duration listed in the file.
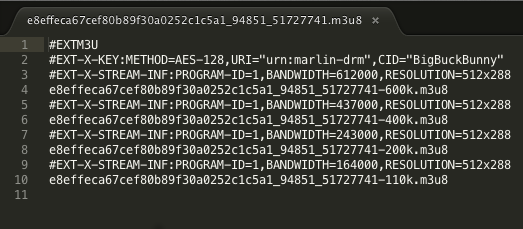
Each .m3u8 file must also have its Key URI values changed. Instead of referencing the file name, change the value to “urn:marlin-drm”, add a comma after the quotes, and append “CID=”<value>””. The ‘<value>’ used in the CID is a unique string used by Marlin. In this case, the <value> is BigBuckBunny
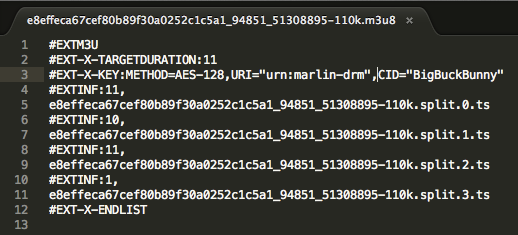
These configuration changes must be repeated for the playlist for each bit rate. The CID must remain identical throughout all playlists, and the TargetDuration must be updated to match the longest duration file in each playlist.
Configuring the Master Playlist
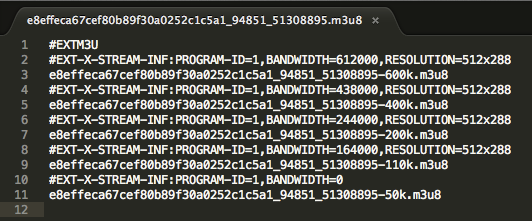
HLS uses distributed playlists. There is one playlist for each bit rate, and one master playlist that directs the player to the requested bit rate playlist.
This master playlist must be configured similarly to the bit rate playlists. To configure this playlist, simply add the Key:Method line used in the previous playlists to the master playlist. Place the line between the #EXTM3U line and the first #EXT-X-STREAM-INF: line.
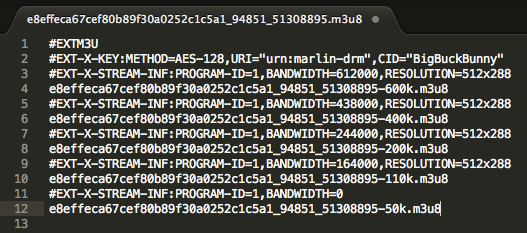
Because there is no 50k content available, it needs to be removed from the master playlist. To do this, remove lines eleven and twelve. This way the player will begin looking for content in the 110k stream rather then the 50k stream.
With the master playlist configured, this batch of HLS content is now ready to be hosted and played.
Note: Encoding.com returns HLS content with the mime type “x-mpegURL” which is not supported by ExpressPlay. To ensure playback on all devices, be sure to edit the content type metadata in S3 to vnd.apple.mpegURL which is supported by ExpressPlay.